How to set up RemiBit in your Ecwid online store?
Ecwid Integration Procedure
To start using RemiBit on your Ecwid store, please take the following steps:
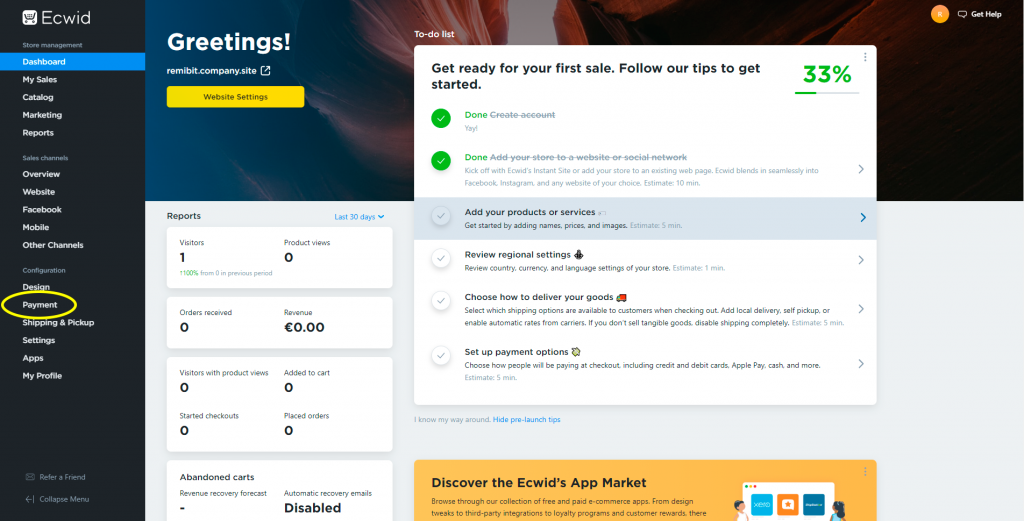
1. Log into your Ecwid Control Panel and click on Payment:
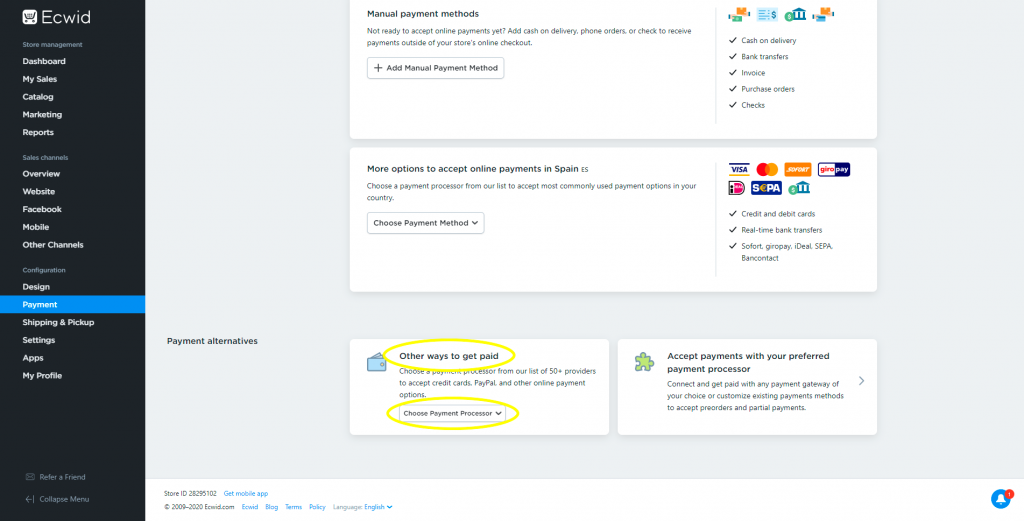
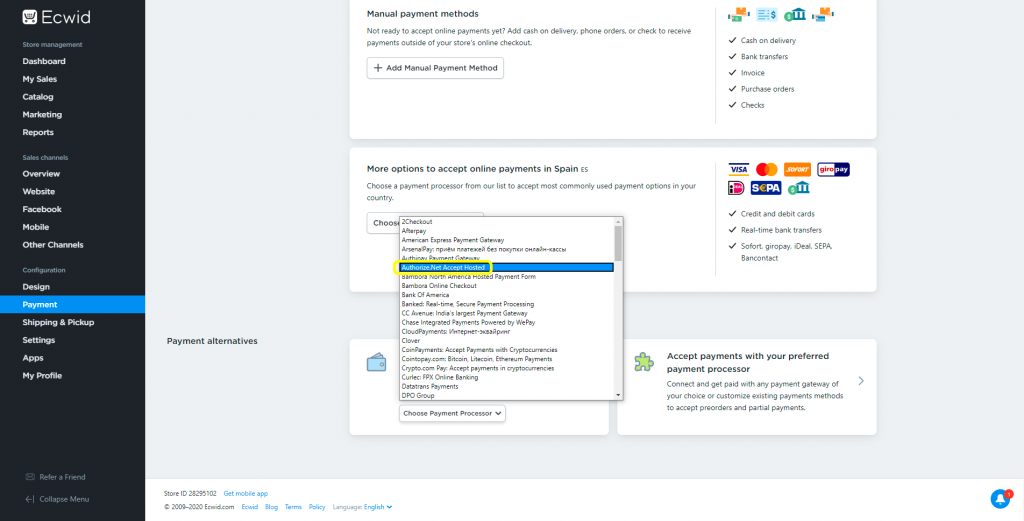
2. Scroll down and in Other ways to get paid, click on Choose Payment Processor. From the list that unfolds, select Authorize.net Accept Hosted:
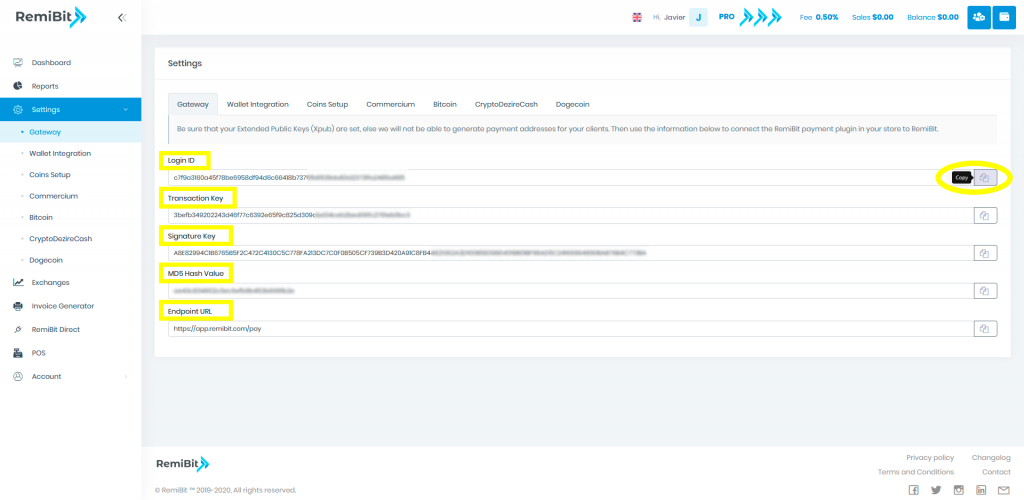
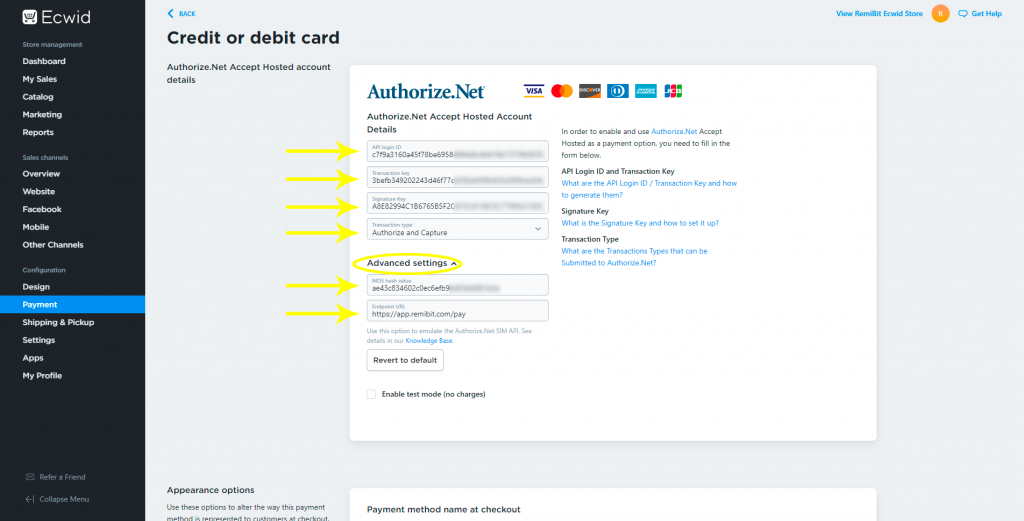
3. Go to RemiBit Settings Gateway tab to find the data fields we need to set up now. Keep it in another tab because we need to copy from there to the RemiBit payment method.
4. Click on Advanced settings. Copy the data in Login ID from RemiBit settings and paste it in the API login ID field in the ecwid payment method. Do the same with Transaction Key, Signature Key, MD5 Hash Value and Endpoint URL. Select Authorize and Capture as Transaction type and finally in Payment method name at checkout, type RemiBit Checkout. Click on the Save blue button:
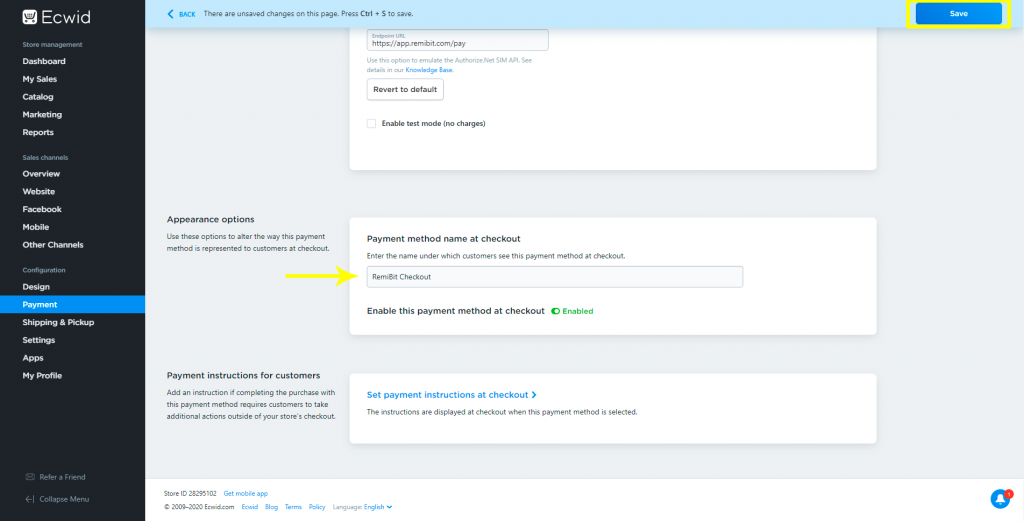
5. Click on BACK:
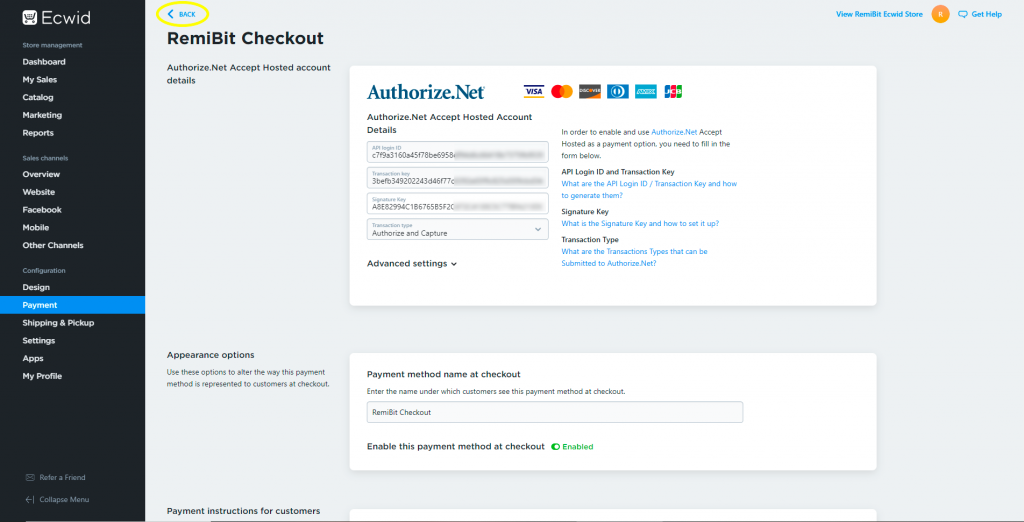
6. Your RemiBit Checkout payment method is successfully set up and enabled.
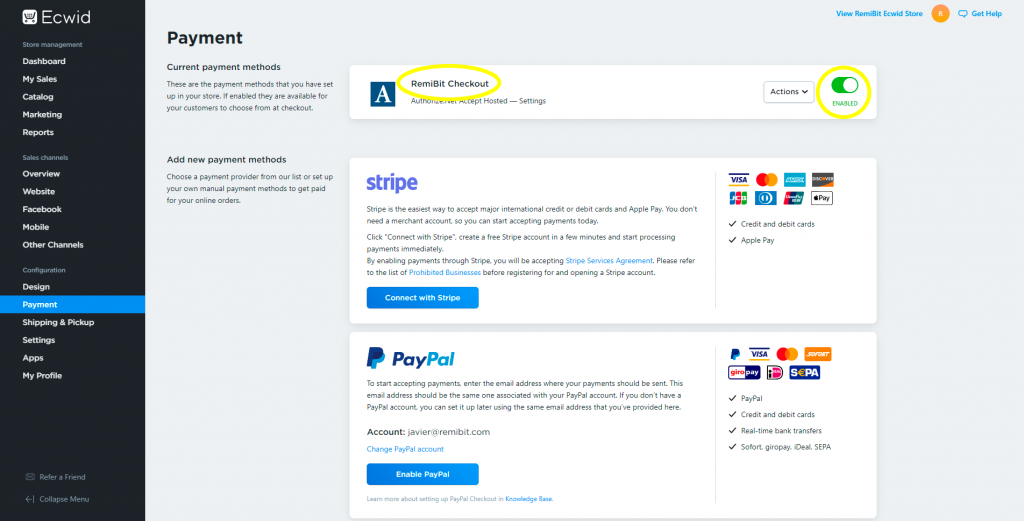
7. Congratulations! Your Ecwid store now accepts cryptocurrencies with RemiBit state-of-the-art technology!