How to set up RemiBit on your WHMCS platform?
WHMCS Integration procedure
To start using RemiBit on your WHMCS platform, please take the following steps:
1. Download the plugin from the RemiBit github.
Find the whmcs-remibit.zip file, right click it and “save link as” in a folder of your choice.
2. Unzip the file you just downloaded. You will find three items: a folder named modules and two files, README.md and LICENSE.
3. Copy the modules folder into your WHMCS root structure. Doing that will paste the RemiBit plugin in place.
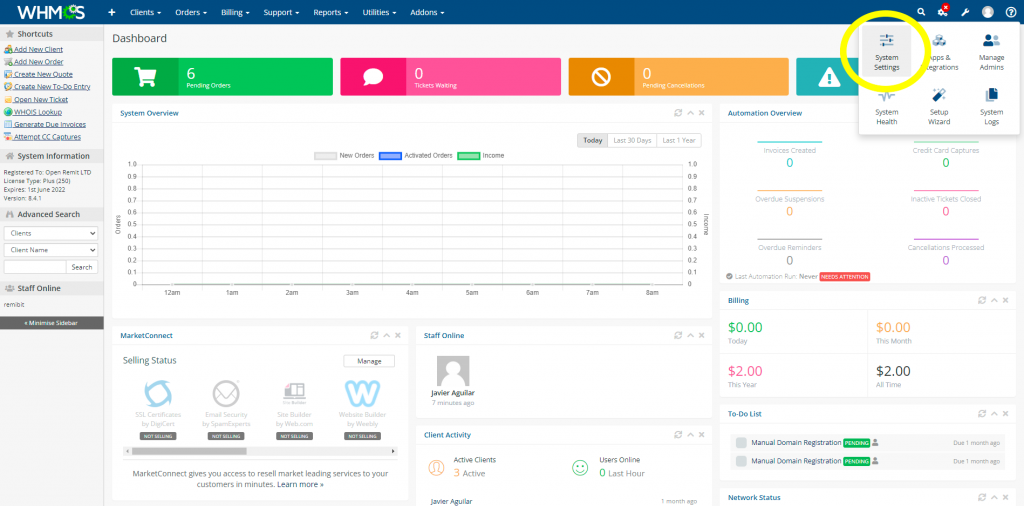
4. Log into your WHMCS Admin area, click on the wrench tool and click on System Settings:
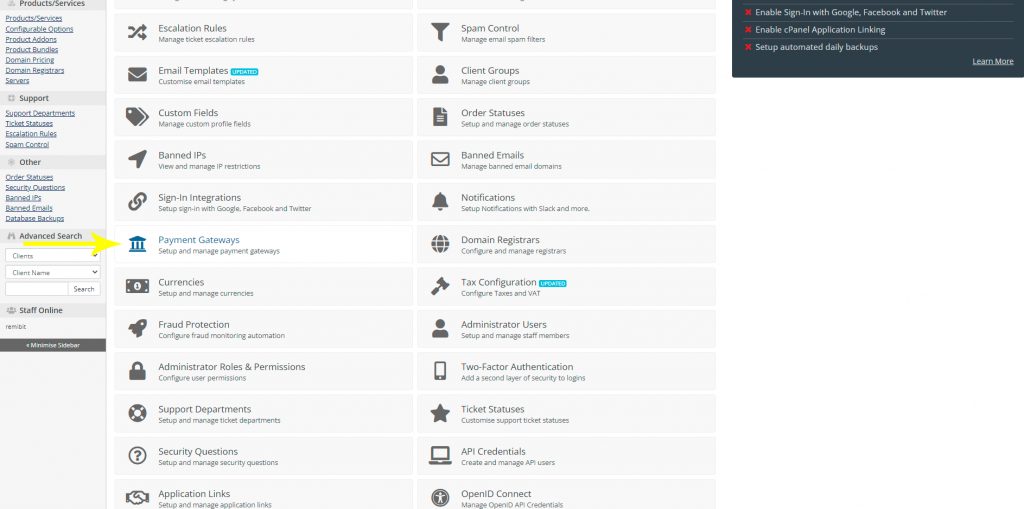
5. Scroll down and click Payment Gateways:
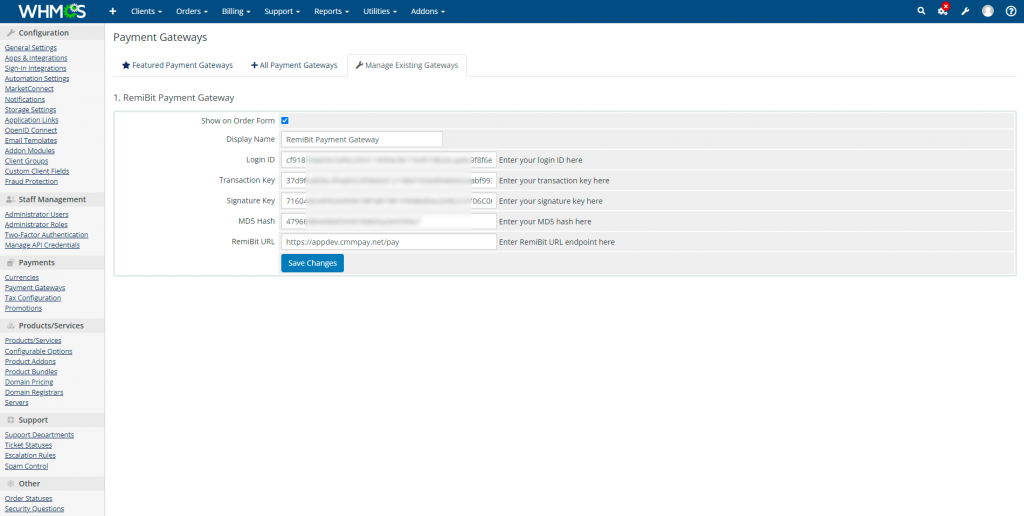
6. Click on Manage Existing Gateways and select RemiBit:

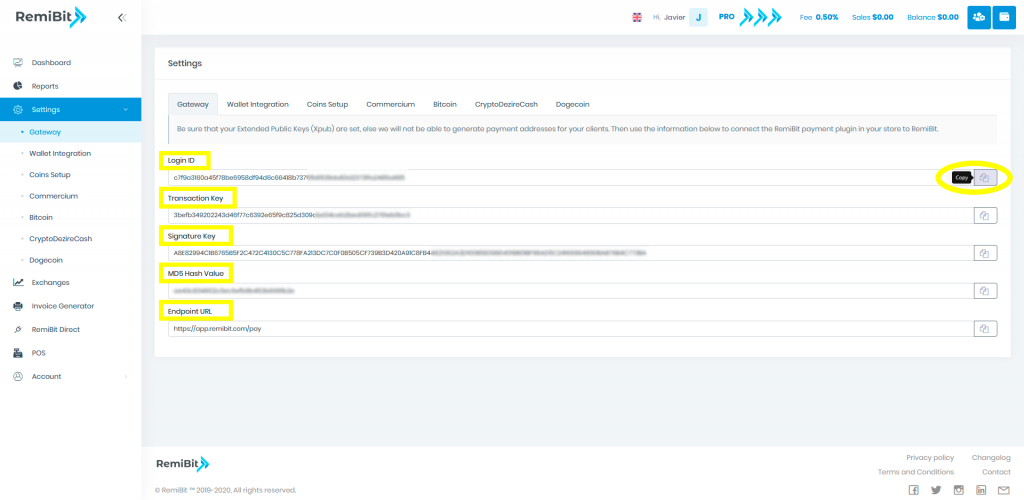
7. Go to RemiBit Settings Gateway tab to find the data fields we need to set up now. Keep it in another tab because we need to copy from there to the RemiBit extension.
8. Copy the data in Login ID from RemiBit Settings and paste it in the Login ID field in the RemiBit Payment Gateway form. Do the same with Transaction Key, Signature Key, MD5 Hash Value and Endpoint URL. Tick Show on Order Form and fill up RemiBit Payment Gateway as Display Name. Click on the Save Changes button:
9. Congratulations! Your WHMCS platform now accepts cryptocurrencies with RemiBit state-of-the-art technology!